Intro:
I see so many questions on forum & reddit regarding this one & we have no this info on wiki, I find it really a big problem. It was the same case for me when I first time got my Pimax & initially the image was sharp but then it got blurry & I had read this forum wiki but didn’t find an answer & put my Pimax on a shelve for 5 months.
So I try to do it a bit easier for newcomers to try to setup the image quality for the first time.
Instructions:
Editing config SteamVR file:
Finding the config file location:
We need to adjust steamvr.vrsettings file to put some values there as steam can override those & it makes image look worse. But it’s important to understand that there are can be several instances of the same file in different places, so here is a way how to check what steamvr.vrsettings file to edit:
- open cmd (press win + R or click start button & type cmd) and run next command
"C:\Program Files (x86)\Steam\steamapps\common\SteamVR\bin\win64\vrpathreg.exe"
please make sure you have put quotes as path with spaces won’t work otherwise
it will tell you what folder your current config files are in, then edit steamvr.vrsettings
- When editing file ensure you place commas & quotes (“” shouldn’t be pretty quotes “”) the same way as other values in the file otherwise your added changes can be ignored or deleted by steam from config, also make sure that last lines in config arrays structures have no comma, comma should be added at the end on all lines but lasts.
Adjusting config values:
Caution after recent SteamVR beta merges it seems for Pimax & some other HMDs 2000 values don’t work anymore, try to use at least 5000 to get acceptable overlay quality: link https://community.openmr.ai/t/steamvr-compositor-issue-steamvr-1-15/33137/14?u=teigue


Config values in text form
I’ve put not all values here, use it just to copy paste to not type manually, but make sure you don’t delete your others config values
  "GpuSpeed" : {
    "gpuSpeed0" : 5000,
    "gpuSpeed1" : 5000,
    "gpuSpeed2" : 5000,
    "gpuSpeed3" : 5000,
    "gpuSpeed4" : 5000,
    "gpuSpeed5" : 5000,
    "gpuSpeed6" : 5000,
    "gpuSpeed7" : 5000,
    "gpuSpeed8" : 5000,
    "gpuSpeed9" : 5000,
    "gpuSpeedCount" : 10,
    "gpuSpeedHorsepower" : 5000,
    "gpuSpeedRenderTargetScale" : 1.5,
    "gpuSpeedVersion" : 2
  },
   "steamvr" : {
    "background" : "#FF000000",
    "maxRecommendedResolution" : 16384,
    "AllowSupersamplingFiltering" : false,
    "playAreaColor" : "#00000000",
    "showAdvancedSettings" : true,
    "showMirrorView" : false,
    "supersampleScale" : 1
  },
   "system.generated.reactor steamvr.exe" : {
    "motionSmoothingOverride" : 0,
    "resolutionScale" : 100
  },
If you don’t have these values in your config just add it.
Notes about SteamVR config behaviour:
- You need to know that every steamvr update it’s possible that steam can hack those values & if you notice degradation of image quality you are probably need to check it one more time.
- Steam can revert this settings even not on every update but right after your changes of config, in most cases this is indication that you made a typo/mistatke (comma, quotes, bracket, padding etc) but sometimes users reported that they had to adjust configs 2-3 times & restart steam to get it accepted, but if you edited config & restarted steam 5 times & file gets reverted then most probably you have a mistake, try changing settings partially, one by one, e.g. add max resolution only & see whether it’s kept, then you can eventually add other sections & check them out.
- If you changed only one line & it gets reverted & previous point didn’t help, try to make your file read only & start steam & check it, it’s a bad way as it doesn’t let you to adjust settings & steam can’t put needed info in there but for debug purposes it just works.
- On top of it gpuSpeed is changed every steamvr startup, so it decreases your overall gpuHorsePower estimation & in about 5-7 runs it will affect overlay quality if you have low/mid range video card, so you might to write a script to do it on a regular basis, or just copy the file with settings & replace it from time to time (soon though, we will have Pimax Experience software layer & it’s intend to fix this problem).
Community made program that adjusts SteamVR config automatically on run:
Recently @BNP had made a program that automatically finds your correct steamvr file location & adjusts values there, it still doesn’t prevent steamvr from reverting it back due to various reasons, however it’s extremely easy now to adjust the settings, please find the program link here:
direct link: https://github.com/craftyinsomniac/WFOVFix/releases/download/v0.1/WFOVFix.exe
Keep in minds that program doesn’t change all the settings but most of them, the list which it changes is here:
maxRecommendedResolution = 16384;
GPUSpeed’s = 2000;
gpuSpeedRenderTargetScale = 1.5m;
allowSupersampleFiltering = false;
supersampleScale = 1;
Pimax VR Experience beta solution for this config problems
You also can check another great attempt to mitigate this annoying config issue, check bellow thread, basically this is replacement of default Pimax Home which is Unity made VR app which allows you to start most of the vr titles you have (steam vr, oculus, revive etc) with adjusted steamvr settings on the fly (well at least it was the idea & this app is in raw dev state yet I would say but already useful), so you don’t need to edit config manually, also it allows to change pitools settings in vr & other stuff, check it out:
https://community.openmr.ai/t/pimax-vr-experience-open-beta-0-50-releasing-now/31649
Other issues that prevent normal PiTool / Steamvr work:
If you experience something weird try to delete those folders & reinstall PiTool:
C:\ProgramData\pimax
C:\Users\%username%\AppData\Roaming\PiTool
C:\Users\%username%\AppData\LocalLow\Pimax
C:\Users\%username%\AppData\Local\Pimax
C:\Users\%username%\AppData\Local\PiTool\
You don’t need delete it every time when you install new version. But if you have troubles - it can help.
I’ve write a .bat script to clean all this folders to not do it manual as it can be annoying.
Copy content from below section & put it in file with .bat extension, now with only 1 click you will clean all those folders automatically. If log complains that some files can not be deleted try to run it with administrator rights by right clicking on it & selecting appropriate option.
BAT file content
@taskkill /F /IM PiTool.exe
@taskkill /F /IM PiService.exe
@taskkill /F /IM pi_server.exe
@net stop "PiServiceLauncher"
RD /Q /S C:\Users\%USERNAME%\AppData\Roaming\PiTool
RD /Q /S C:\Users\%USERNAME%\AppData\LocalLow\Pimax
RD /Q /S C:\Users\%USERNAME%\AppData\Local\Pimax
RD /Q /S C:\Users\%USERNAME%\AppData\Local\PiTool
RD /Q /S C:\ProgramData\pimax
set /p WAIT=PiTool folders were removed. Hit ENTER to continue...
Example: we got new 262 PiTool release & it increased performance & GPU utilization but many users complained it didn’t, so after debug it was found that deleting those folders & reinstalling PiTool solved the issue.
Colours:
- If your colours look poor & contrast isn’t great, try put +2 contrast & -2 brightness it will cause some colours crush but can overall enhance your experience. Try to play with values further. Upcoming Backlight Brightness option also should help with this problem.
- Some Pimax HMDs like 5k+ look blueish / cold, try to add contrast +1 on red channel on top of your channels settings, e.g. if you have contrast +2 globally make sure your red channel has +3 contrast.
Fogging:
- It’s a bit problem though, and can be a really annoying one, if you can wipe the moisture on external lenses side, if it got fogged on the internal side the only way to clean it is to dry it. So this is critically important in order to maintain your image crispness. It can be enhanced by using 5v fans or buing some mod like https://www.vrnchill.com/

- Another option is to use external fan & point it to the noise gap & place the fan in front of you (e.g. on the floor).
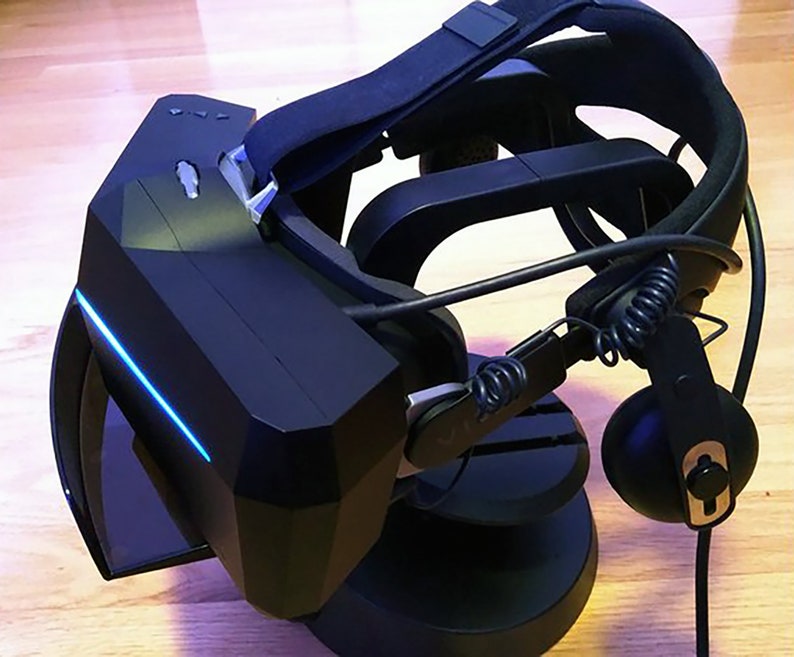
Counterweight & straps:
-
If you will try to check the HMD balance by grabbing HMD in the middle point of top head strap, in point where your heads middle point is with your finger (if you use non standard strap coz cloth strap obviously won’t allow to do this)

you will notice that HMD tends to tip in front direction as all weight is put in the front part, to make it more comfortable & make it stable (to keep aligned HMD position to keep the image crisp) you can use a counter weight, if HMD properly balanced it should stay in horizontal position while you holding it in the middle point of the top head strap. You can use velcro straps & some weight like power bank (appromixetely 200 - 300 grams depending on your head strap) or whatever works for you, e.g. attach small ballbearing as myself I had a lot of it or any other heavy thing, also you can buy a mod from third party, something like this https://www.studioformcreative.com/product-page/vive-das-200-gram-7oz-enthusiast-kit

-
If you experience comfort issues with your strap you can try Vive DAS (Deluxe Audio Strap) with 3d printed adapters (can be bought or 3D printed manually, example of adapters: Pimax + Vive DAS Adapter by Drcube - Thingiverse, you can buy it for example here PIMAX 5k 8k HTC Vive Deluxe Audio Strap DAS Adapter 3D Printed Pimax Vive Das Adapter - Etsy google for other options). It feels a lot better. I didn’t try new SMAS/DMAS but I anticipate they also should enhance comfort a lot.
PiTool Settings Explanation:
- PiTool Render Quality (RQ) - usually you want to keep it at 1 value & adjust SteamVR SS slider to adjust performance/quality ratio, some people reported that setting RQ to 1.25 or to 1.5 & decreasing SteamVR SS to 0.5-0.75 worked better & provided better quality with better performance, if you want to check further on this topic try to check this article:
https://community.openmr.ai/t/how-the-render-target-resolutions-and-the-supersampling-factors-of-pimax-and-steamvr-work-together/19506 - Hidden Area Mask (HAM) - usually you want to keep it always on, it avoids rendering pixels that are not visible in HMD, from my experience I never had need to disable it.
- Smart Smoothing (SS) - limits your fps if it even slightly falls beyond set HZ mode by halving the value, e.g. if you have 90Hz set & you GPU struggling & provides 88Hz then logic will half 90 to 45FPS & GPU utilisation will be much lower then logic artificially interpolate frames & can do some other stuff with CPU & feed HMD with those frames in initial 90HZ (or any other). It usually leads to double vision when you turn your head fast but can work quite good in some conditions, also if your GPU/system can’t achieve half of FPS e.g. you set 90Hz with SS but GPU can do only 40 with current settings or if your GPU does 90+ & often has 88 fps drops SS will turn on & off & you can experience some artifacts, so better to get a spot where it will be always off/on.
- Parallel Projection (PP) - if game doesn’t work with wide FOV HMD which Pimax is then you will get double vision, this by CPU/GPU techniques achieves wide FOV picture without double vision but it comes at performance price & as larger your FOV the more resources it will drain, it’s not linear so large FOV consumes much more resource than Normal or Small FOV if you interested you can check additional details here: https://community.openmr.ai/t/closer-look-at-pimax-parallel-projection/20510
Performance:
- Make sure you have 262 PiTool or later as it significantly increased GPU utilisation if you have installed older version on your PC make sure you deleted the old folders as it can affect it in a wrong way, check folders paths above on this page (in " Other issues that prevent normal PiTool / Steamvr work" section). Link to recent PiTools https://community.openmr.ai/c/Pimax-pitool/41 & the 263 version particulary https://community.openmr.ai/t/pitool-1-0-1-263/29985/2
- Try to disable all antialiasing settings in 3D settings video card Panel (e.g. Nvidia 3D settings) & disable it in game settings + disable shadows etc, once done start with trying different settings to achieve acceptable image quality with no loosing significantly performance.
Basically FXAA - most fastest but makes picture blurry, SSAA has best quality but is the slowest one & significantly affects performance, MSAA & MFAA are in the middle & work quite well for most of the cases, you can check additional data here: PC graphics options explained: Page 2 - Page 2 | PC Gamer - Ensure that your HAM enabled & PP disabled (check above PiTool settings section), although some games can require PP otherwise they will look doubled, but PP decreases performance but some games have workarounds which allows you to play games without PP like Project Cars 2 so try to google it.
Nose Pain:
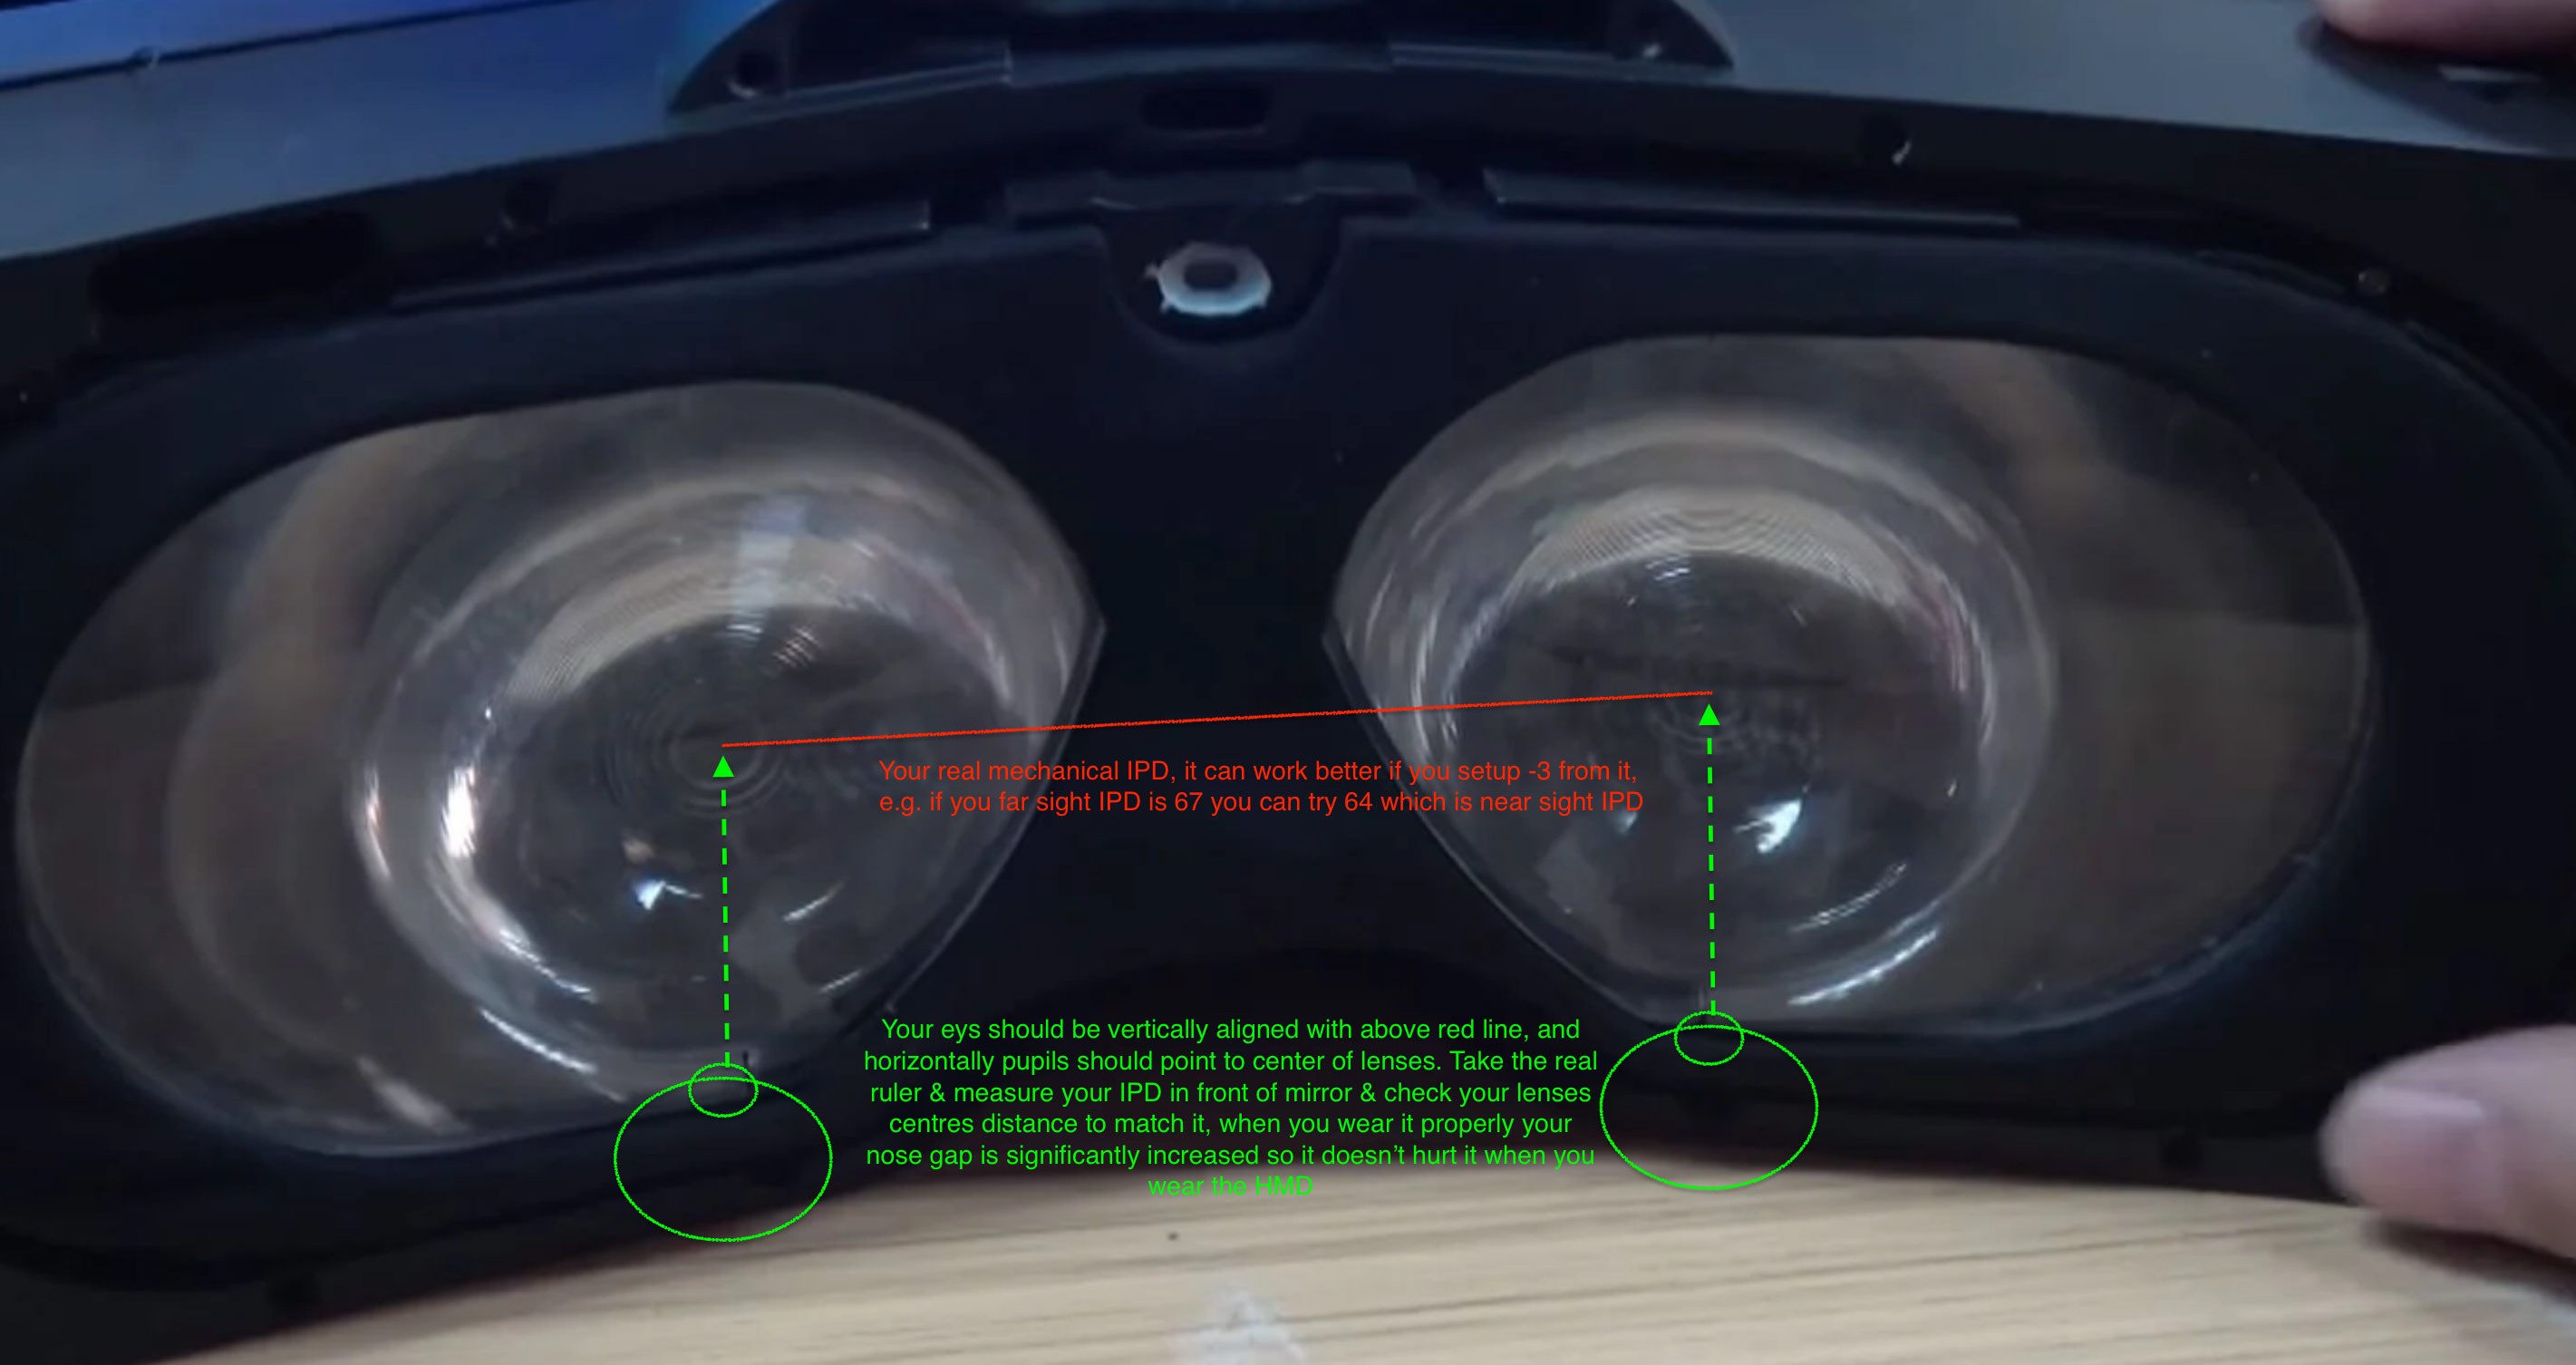
- It was confirmed many times that not even newcomers but experienced users wear Pimax headsets wrong, which leads to nose problem as well, usually you want to move HMD upward vertically & tilt the bottom part a bit away of your face to free some space for your nose so your eyes are at the same vertical lever as red line on picture below, some face shapes can work differently but usually it works. Once done you may lose some 3d depth feeling first but it means that you need to adjust your software IPD offsets, check it later in IPD section. Also make sure you mechanical IPD is adjusted as much as possible to length of red line below, sometimes near sight IPD will work better, e.g. my IPD is 67, my near IPD is 64 & it works better for me with Pimax.
Missing 3D Immersion Or Wrong Scale Of World:
- Most likely your software IPD isn’t set properly, coz to get correct stereoscopic image human vision in VR needs to get 2 images a bit misaligned if they aligned you will end looking at flat screen rather than “being there”. Also if you have misaligned images but theyre too far / close then your scale of sense of world will be affected. Next point in IPD section explains how to set it properly with the link to dedicated guide. Also it’s worth to note that you might have wrong set real mechanical IPD as above image proposes, you can think that you IPD is X but it can be a bit bigger / lower so try to adjust mechanical IPD as well a bit as long as software method mentioned earlier, also check this for better understanding how real IPD can affect the scale & both eyes focus in canted HMDs https://community.openmr.ai/t/clarifying-near-ipd-x-distant-ipd-confusion/14809
Important notes about IPD:
-
If you feel eye strain or image looks wrong (wrong geometry proportions) try lower software IPD by a bigger value (e.g. -4) coz IPD popup has wrong real IPD value shown & it was confirmed by many people, I often saw that many people are not aware about this problem & kept to using their HMDs for years with wrong IPD offset, just play with it. Here is full guide how to setup your IPD correctly & forget about eye strain https://community.openmr.ai/t/guide-how-to-achieve-perfect-real-view-with-pimax-ipd-compensation/18369
-
If you need to tilt you HMD to make the image look better no need for expensive purchases, just use 2 sided velcro strap & add it between plastic bracket & face cushion on one or another side, you also can add it to all sides to make cushion thicker if it works better for your face shape, another tip is that you can add 1cm gaps in velcro strap to add some additional ventilation however it may lead to light leakage but works fine in dark room environments.
-
Also try to close one eye & by looking straight (not aside) ensure that both of your eyes see sharp. Measure your IRL IPD with ruler in front of mirror & ensure your mechanical IPD is close to this value (by using ruler as well between lenses circle centres check the above image & the red line on it). Then do software IPD adjustment to make popup value equal to yours IRL IPD & decrease it by -3 or -4, e.g. your IPD 64, make it in software IPD offset setting to be 60. Actually for software offsets there is better technique - you can look at VR & real objects at the same distance & by quickly changing views (put your HMD on & off) compare difference, you need to ensure your eyes don’t refocus at VR & real objects when you quickly change the view. It can help to reduce your eye strain & feel more natural wearing your HMD coz you will have the same or similar convergence as in real life check this guide for additional details: https://community.openmr.ai/t/guide-how-to-achieve-perfect-real-view-with-pimax-ipd-compensation/18369.
-
Also try to move your HMD vertically to correct position where the widest horizontal lenses picture line is (check above image & the red line on it), if your image not properly vertically aligned after mechanical adjustment try to adjust both vertical software IPD offsets, close 1 eye, change it in the runtime to spot most comfort position where your eye is not stressed & sees relaxedly, it shouldn’t look upward but rather look straight forward & a bit lower so your eye’s muscles don’t work all the time, then adjust it on both sliders, open your second eye & check, don’t do it with both eyes opened as it can cause eyes strain.
-
Some people reported that they have eye strain & it was found that in some cases it was due to a persons IRL eyes vertical offset, so try to close one eye, then quickly change eyes & see if there is significant vertical misalignment, if so try to adjust one of the eyes to be on level, just a note, it’s normal for stereo picture that left & right pictures not fully vertically aligned, so try to use IRL reference & at the same distance try to achieve the same vertical difference in HMD.
-
Also another note, some people experience problems with fixing their HMD correct alignment. One of the ways to do this is to fix your HMD with your hands on your face, also make sure that you push it against face with the force you would like to have once strap is tighten, once aligned keep it in the position & adjust your head strap to lock this position.
Understanding how steam gpuSpeed works & why you need to adjust it on a regular basis yet:
How to get full clarity & sharpness in SteamVR Dashboard (overlay) on low-end GPUs with Pimax:
Replace Pimax logo on startup page with tool image that helps you to align your HMD properly.
Copy to :
C:\Program Files\Pimax\Runtime\resource\
Rename to: pimax_default.jpg (save the original image if you need, but the image comes with pitool updates)
This replace the Standard Pimax Logo and you can adjust ipd and offset.
Used info from other users posts:
- https://community.openmr.ai/t/8k-x-impression-review/29137/22
- https://community.openmr.ai/t/please-im-asking-for-help-with-my-8k/29163/16
- https://community.openmr.ai/t/8k-x-impression-review/29137/15
- https://community.openmr.ai/t/low-resolution-with-new-262-pitool-and-low-gpu-usage-and-8k/29658/5
Thanks to @SweViver for providing great posts regarding settings tips & tricks.
[update] Neal - Now uses standard quote characters around C:\Program Files (x86).…\vrpathreg.exe command (instead of “pretty” quotes)