Tips for Getting the Most Out of Your 8KX
The 8KX’s resolution and FOV are great. I like my 8KX a lot, but I’ll be the first to admit that it’s an enthusiast HMD which needs tweaking, customization, and a powerful GPU to reach its full potential. Note that most of this info is applicable to other Pimax headsets.
Here are my tips, assuming your Pimax headset has just arrived. If you already have your headset, skip down to a section which is relevant to you. Here’s is a list of topics:
- Unpacking
- Setting your IPD
- Fitment
- Issues and Artifacts
- Using PiTool
- SteamVR
- Flashing the Firmware
- Games
- Recommended Accessories
Unpacking
Was your packet with the instructions and lens-cleaning cloth missing (or you can’t find some other small part like an ear speaker)? If so, shake the box. You should hear something sliding around. If you do, rip the liner up and extract the packet, which contains instructions and the cleaning cloth. Imo, this makes the packaging “sub-standard”, since this issue should not be possible.
Did you get 2 face-pad foams? One will be attached to the headset. If you are having trouble with lens distortions and you don’t have a second pad, file a Customer Support “ticket” and ask for the other one. Here’s how to determine which foam pad (thick or thin) you actually received: Both the thick and thin foams have a glasses cutout, but the thin foam’s slot stops short of the edge so there’s a ridge to block the light, while the thick foam is a complete notch from edge to edge.
If you need the other face-pad or have any headset issues, go here: Submit a ticket : Pimax Support
Setting your IPD and Headset Position
The IPD is set via the adjustment wheel on the lower right corner headset, on the side closest to your face. Unfortunately, setting your IPD correctly is tricky, probably due to the canted (angled) LCD panels, which is a key feature of Pimax’s wide FOV headsets. Your eyes need to be in proper position relative to the lenses for maximum in-focus area and minimum visual distortions. The exact spot for the “ideal” view is quite small, on the order of 1 or 2 mm.
To adjust the length of the top strap, lift the Velcro tab that is on the top front, determine the optimum length (remember that it will stretch a bit), and then push the tab back down.
Note that the “ideal” IPD of a Pimax headset is highly specific to each individual. It took me months to find my optimal settings. A wide range of physical IPDs are “OK” for me. I thought I had my IPD set up correctly (based on my actual IPD measurement). However, the world scale was wrong in Elite Dangerous. I later read a forum post that encouraged me to experiment: I discovered that a lower IPD setting fixed my world scale problems in ED.
Please note that at least some people seem to have trouble adjusting to the canted displays or (perhaps) their headset wasn’t assembled to the correct tolerances.
One thing I cannot tolerate is setting the PiTool software IPD offset to anything but zero. Tiny changes give me near-instant eyestrain. When I tried making adjustments, I had to close my eyes and rip the headset off, within a second or two. I was surprised at how strong my reaction was.
Others find the IPD offset to be the key to their comfort in VR, so you should at least try adjusting that setting. The latest beta version (1.0.2.086) of PiTool increases the setting “steps” to 0.1mm (down from from 0.5mm). If you want to adjust the software IPD offsets, I recommend that you update PiTool, since finer adjustments should help you optimize your eye comfort.
This is the setup procedure I recommend:
You need to position your eyes to an exact spot in the lens for maximum image fidelity (minimal distortions). Look through your dominant eye (close the other eye) and move the headset up and down, angle it slightly up and down, then left and right, pull the headset away from your face, and then push it firmly into your face. Keep trying different positions. The goal is to find the absolute best image with the least distortion for that eye.
Now close your good eye and repeat the procedure. Once you’ve found the optimum position for your second eye, try to shift the headset to the optimum position for your dominant eye. You are trying to find the position where both eyes are optimal. Once you’ve found that “ideal” spot, adjust the IPD such that your nose is comfortably in the center of the nose cutout, while your eye stays in the optimum spot. You are trying to optimize both eyes’ views, using the IPD wheel, software IPD, and Vertical Offsets (in that order). You should be able to find configuration that best fits your particular face.
If you still can’t get both eyes to be clear at the same time, you may have an unequal distance from each eye to the center of your nose. Try this:
Adjust the IPD for your left eye (with other eye closed) and make a note of the value. Then repeat with the right eye. Now, set the IPD to the middle of 2 values you determined above (IPD.Left + IPD.Right) / 2 and then push the headset towards the eye which had the largest IPD value. If the result is clear, there are a couple of things you can try:
- In PiTool, adjust the software IPD, individually per eye, so that the view shifts each eye towards the offset from the center of your nose. Also try adjusting the per-eye vertical adjustment. See PiTool section below, for details.
- And/or you may want to add some padding to the nose area, so that the headset aligns with the clearest image. You may need to remove some material from the other side, if this pinches your nose.
If your eyes don’t quite line up vertically (like mine), use the software Vertical Alignment. I found -1.5 and +1.0 were best for me. Caution is advised, if you use different per-eye values: I discovered that 3D is better for me in VR than in the real world, but when I’m tired, the real world no longer lines up for my eyes. I need to concentrate to bring things back into alignment. How I never noticed this before is surprising to me, but VR has triggered this odd physiological effect.
Some of the things that others have suggested give me instant massive eyestrain. Basically, I must leave the software IPD adjust at 0. Others find that they cannot use the headset without adjusting that software setting.
Fitment
First, adjust the top strap. People, myself included, often forget to adjust this, especially when fitting the headset for use by friends or family.
It’s vital that the headset “naturally” falls into place with your optimum lens positions. Those positions are only 1-2 mm wide (per eye), so fitting your headset is very important for your satisfaction in VR. Adjusting the top strap length changes the height of your headset and the corresponding lens height, relative to your eyes.
Lift the Velcro tab on the front of the top strap. Adjust it for length, keeping in mind that the strap setting will stretch a bit. Then firmly press the Velcro tab back down. You may need to readjust the strap occasionally, if the headset is drifting from its optimal position.
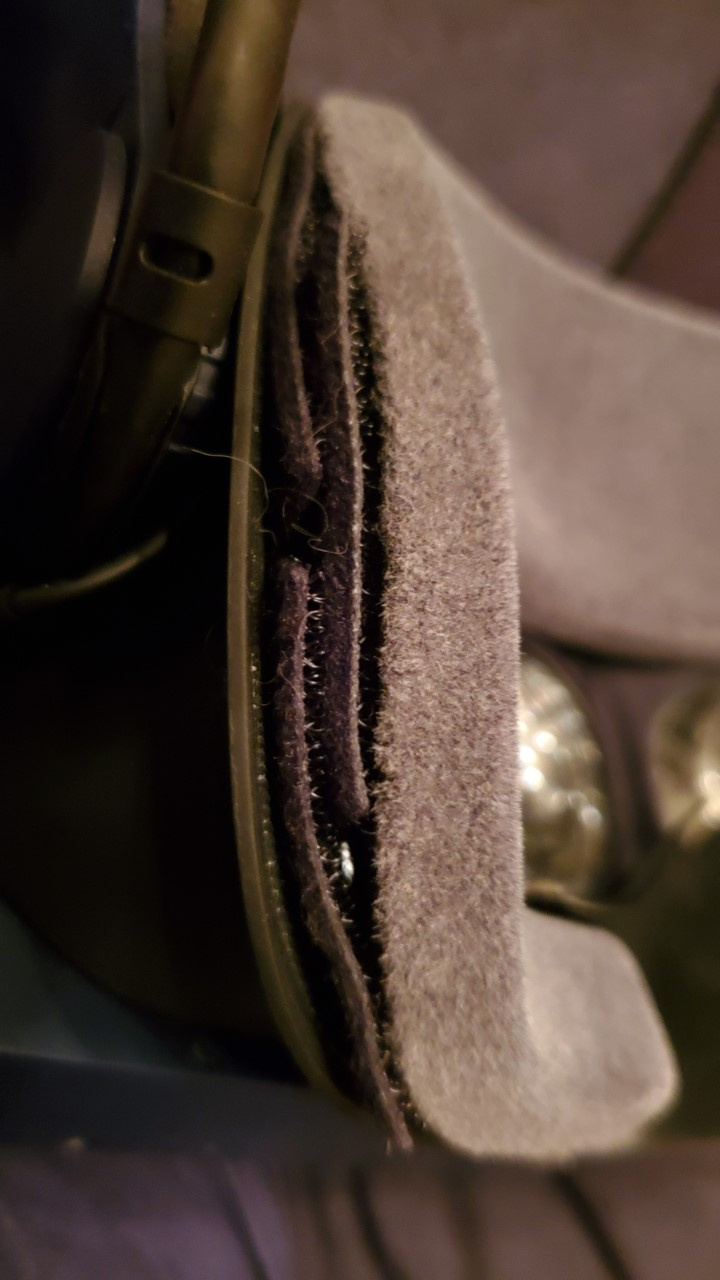
You may need to add or remove padding or add a counterweight for best fit and comfort (discussed far below). I added a bit more width to the side pads on the MAS (modular audio strap), by using a few strips of Velcro, as shown below.
You may need to increase or decrease the face pad foam layer. Some people use two pads. I only needed to add 1 or 2 mm to my original 8K, so I added a layer of double-sided Velcro between the pad and the headset housing along the top. For that mod, I left gaps between the strips so that heat and moisture could escape. I angled the cut ends, so that it blocked the light better.
Some people may notice that when they look to their right, their left eye can see a bit of the right lens. The same problem can occur if they look to the left. Since my eyes are very close to the lenses, I don’t have this problem, so the simplest solution would be to try to get your eyes closer to the lenses. Otherwise, you may want to add a small strip of foam or fabric in the center (between the eyes) to prevent this from happening.
If you find the headset to be front-heavy, consider adding counterweights (which are discussed in detail in their own section below).
Issues and Artifacts
This section covers some of the more common visual issues you may experience and any tips or solutions I can suggest.
Basically the 8KX headset is similar to the 5K+ and 8K: If you see distortions with them, the 8KX will probably have them too. If you like your 5K+ or 8K, you’ll probably like the 8KX. At this point, game rendering issues (like alias “jaggies” and object popping) are more distracting than any of the issues listed below. I should also mention that the jaggies on the 8KX are much reduced, compared to my original 8K, simply because the pixels are smaller.
Lenses
If the view through the lenses seems foggy, blurred, or if you see excessive god rays, you may need to clean your lenses. Do not use any harsh cleaners: Abrasives, alcohol, acetone, etc. will likely ruin your lenses. Instead, breathe lightly on a lens (so that it fogs) and gently wipe clean with a lint-free cloth. Repeat as necessary.
You may find that the image is clear at the center of each lens, but not quite clear when looking straight ahead (which is not through the center of the lens, at least for some people, including me). Hence, the complaints about not being able to get the lenses close enough.
I’m beginning to think that there is a fundamental difference in our expectations.
As a glasses wearer, I’m used to having portions of my vision “not quite” in focus. The very center of my vision on either my 8K or 8KX is ever so slightly fuzzy, but that doesn’t bother me at all. It’s more pronounced on the 8KX, simply because the resolution and SDE is so much better.
Given the practicalities of lens design, I think Pimax designed the lenses so that the maximum area would be in focus. If the straight-ahead area was super crisp, more of the total area would be blurry. This is inherent to the canted panel design. This is essentially a bokeh effect, due to the fact that the screen is not at the same depth.
I’m not certain this is fixable with any lightweight lens design. (No one wants 2 pounds of glass lenses in their headset.) A very small aperture might help, which would increase the distance range that is sharp, but that would drastically dim the image.
Distortions
I think this is often due to a poorly adjusted headset. Try my setup guide at the start of this post. Distortions are most noticeable in Wide FOV. Try Normal FOV; the view is nearly the same and it’s less demanding of your video card, especially if you have Parallel Projections enabled.
God Rays
I do see occasional god rays, but only when very bright things are on black (most of the time I don’t notice them at all). Depending on the app/game, I do sometimes see thin red or blue lines at the very outer edge of the lenses, but it doesn’t seem to be consistent and I don’t really notice them, unless I look for them.
Unfortunately, while the 8KX doesn’t suffer as much as most other headsets, there’s not much you can do to reduce them, other than avoid bright-on-black scenes and to make sure your lenses are clean. Any grease smears may make god rays more visible or cause a general blurred effect. Try cleaning the lenses as mentioned above (in the Lenses section).
Screen Door Effect (SDE)
I am quite near-sighted. I can clearly see the pixel edge grid on my 8KX in light-colored areas. I also see very thin black lines (similar to an old CRT television) on bright colored areas (like red). This differs from pixel inversion (discussed below). However, I would not call these issues SDE. I can mostly ignore these artifacts. I was never really able to ignore the SDE on my 8K. This is more like what I see on my 8KX:

Pixel Inversion
This visual artifact looks like thin dark horizontal lines running across your view (similar to an old CRT TV). I’ve seen this, but it’s barely noticeable and only appears in rare cases. It’s much improved over my 8K, which still only appeared in rare cases (like when you are really close to a star in Elite Dangerous). I think the higher res of the 8KX is helpful here, since the pixels are smaller and the distance between scanlines is less.
Note that it didn’t particularly bother me on my original 8K, so to me it’s certainly not an issue on my 8KX. Yes, you can see it if you are looking for it, but otherwise it’s easy to ignore, much like the SDE.
Sound
I didn’t bother with the above-the-ear speakers; instead I’m using wireless Corsair on-ear headphones. They fit over the MAS, but the strap was further back on my head than I would like. I removed the standard speakers from my MAS. To do that, just peel back the padding (which is attached by Velcro and remove the small screw in the center of each speaker). For now, I’ve covered the holes with gaffers tape, to prevent dust from entering the empty cavities, at least until my DMAS (deluxe Pimax speakers) arrive. Hopefully, they will be good, so I can avoid the (small) hassle of wearing headphones over the headset. You can order these for your 8KX as an upgrade module from the Pimax store.
Using PiTool
I’m only going to cover the Settings page HMD and Games sections. I’ll also skip over the minor settings, which you can safely ignore for now. Basically, I’ll explain the important settings, when you should use them, and make suggestions and recommendations, so that you can determine an optimum set for a given situation. If you play a lot of games, you will probably want to make per-game setting adjustments, but then you need to remember to launch the game through PiTool, so that it can apply those settings before the game starts.
Pimax Experience is a new VR front-end for adjusting these settings (and more!). However, since it is currently in beta, I will not be discussing it here, other than to note that it lets you adjust many of the following settings, so the sections below are still useful.
HMD Section
Tracking Mode
If you have base stations (lighthouses), select the first option for complete movement tracking. Otherwise, select 9-axis for seated games, where you will only be able to rotate your head and your body will be stationary (unmoving).
The main selling feature of the 8KX is the 4K panels, so I think most people will use Native Mode (4K res) nearly all of the time. However, the 114Hz Upscaling Mode is probably best for fast-paced games like Beat Saber. I’d say the 8KX upscaled looks BETTER than my 8K. The lack of SDE and the higher fill-factor are a huge improvement.
When I switched to upscaling mode, I had to restart PiServer and reboot the headset a couple of times, before the headset successfully entered 114Hz mode. Once it switched, I didn’t have any more issues.
Refresh rate
Currently, the 8KX has limited refresh rates available, which are automatically set by the Panel Mode. I was surprised that the Upscaled 114Hz refresh rate improved my immersion significantly, but I really missed the higher res, so I switched back to Native res and 75Hz (after an hour or so). That went smoothly; I didn’t need to restart PiServer or reboot the headset.
I think the 114Hz mode only makes sense for games which don’t benefit from high res. Any fast-paced game designed for standard (low res) VR headsets might be worth trying in this mode, for example Beat Saber. Flight sims, space sims, driving games, and movies probably benefit more from high res, instead of high framerate.
Games Section
Field of View (FOV)
Large: This is one of the reasons why you buy a headset like an 8KX. Unfortunately, this option takes a top-notch GPU, especially if you need to run using Parallel Projection. It is also the FOV which will probably have the most visual distortions.
Normal: The recommended FOV for most games.
Small: This mode is useful for PCs which have trouble running a particular game with a good framerate. I use this mode for playing Elite: Dangerous, which requires Parallel Projection and benefits from a high level of super sampling.
Potato: The smallest FOV, often used for compatibility with games designed for low FOV headsets. Even though the FOV is still a bit wider than most other headsets, this mode can be used to demonstrate the view of other headsets.
Render Quality (Super Sampling)
The 8KX definitely looks better than my original 8K at the same settings, but the 8KX benefits from higher res (super sampling), which wasn’t really needed for the 8K.
Lately, I’ve been using Pimax Quality at 2 and SteamVR per-eye res (super sampling) at 50%. Note that this is rendering noticeably more pixels than using 1 and 100%. That’s because PiTool Quality is based on the x and y dimensions, but SteamVR is based on number of pixels. That means that you’d need to set SteamVR to 25%, not 50% to get the same rendering res as 1.0 and 100%. (2*2 / 0.25 = 1) The problem with that is that SteamVR only lets you set the value to even numbers. You can actually set it to 25% exactly, by editing a config file, but that’s a hassle. What this means is that the resulting per-eye res will be much higher than it was.
I recommend starting with the default Quality of 1.0. Pimax says that this option does controls more than super sampling, but that is clearly the main thing which changes. The 8KX really shines when this is increased to 1.5 or 2.0, assuming you have a graphics card capable of running at such high resolutions.
Some games already have high levels of super sampling and will crash at startup. Hellblade is one such game. If a game is crashing at startup, try setting this option to 0.5.
Note that this setting is combined with the “per-eye” super sampling resolution in SteamVR, so in general, you’ll leave one of the two alone and only tweak the other setting. I’ll cover more SteamVR details later (far below).
Fixed Foveated Rendering
“Close” means off. That’s where you should leave this setting, unless you need to increase your framerate. The FFR technique works on 1, 2, or 4 pixel blocks (not necessarily square) by drawing fewer pixels and stretching them to cover an entire 4x4 pixel region.
I find the blocky artifacts of FFR to be highly annoying, so I didn’t think I’d actually enable this setting. However, higher super sampling/res means that each of the blocks has a smaller area, when reprojected onto the headset screens. That reduces the blocky artifacts. I now enable “Conservative” mode for demanding games like Elite: Dangerous.
Parallel Projection
For simplicity, I generally leave this enabled, but it’s a 30% framerate hit in Large FOV. That means you’ll need to reduce super sampling and/or lower the in-game graphics settings. Other options are using Small FOV (which is still wider than most other VR headsets) or enabling Fixed Foveated Rendering.
Some games don’t need Parallel Projection and others, like Half-Life: Alyx can be configured so that it’s not necessary. (Details in HL:A section.)
Smart Smoothing
This feature can increase your framerate, in GPU-constrained games, by using the CPU to synthesis intermediate frames (images). Your system needs to be able to maintain at least half the selected refresh rate to enable this feature. While this will result in a smoother, less juddery experience, it can introduce weird visual artifacts. It also reduces the framerate in CPU-constrained games like DCS. If you find the results of this setting unacceptable, you can try enabling Fixed Foveated Rendering (FFR), decreasing the super sampling, or reducing the in-game graphics quality settings (typically, features like shadows and raytracing are particularly demanding).
Backlight Brightness
This option is now available for the 8KX in PiTool, in the latest PiTool beta 1.0.2.086, but you must also update the headset’s firmware. (I’m sure that Pimax will integrate this better in future releases.) Here’s are links to the info: https://community.openmr.ai/t/pitool-1-0-2-086/32958/5?u=neal_white_iii and Firmware
I recommend boosting the brightness. I found that a Backlight brightness of 80 worked best for me, even in dark games like Elite Dangerous. I’ve seen recommendations for 90.
Hidden Area Mask
You should generally leave this enabled (checked). This improves your frame rate by preventing the GPU from drawing stuff that’s off screen (which, of course, you can’t actually see). There are occasions issues with some games, so if you aren’t seeing the full game area, try disabling this setting.
Contrast and Brightness
My 8KX has good colors (for an LCD panel). I’m using +2 Contrast and -3 Brightness, which is a good place to start.
I recommend setting Brightness to about the same (but negative) value as the Contrast. Eg: Contrast = 1 and Brightness = -1.
To counteract the extra dimness, I bumped the Backlight Brightness to 80. Backlight brightness controls the LEDS which illuminate the LCD panels.
The Brightness option in this section simply brightens or darkens the RGB values sent to the panels, which is also what Contrast does, but that setting increases the difference between light and dark RGB values. These settings should be tweaked along with the backlight brightness for best results.
Here’s a more complex set of adjustments which improve the color balance of the LCD panels (assuming a backlight brightness of 90). Click the “link” (![]() icon) button so that both left and right panels are set to the same values. To enable color channel editing, switch the Color Channel to red and set contrast and brightness, then switch to the green channel and set contrast and brightness, then switch to the blue channel and set contrast and brightness.
icon) button so that both left and right panels are set to the same values. To enable color channel editing, switch the Color Channel to red and set contrast and brightness, then switch to the green channel and set contrast and brightness, then switch to the blue channel and set contrast and brightness.
Red:
Brightness: -4
Contrast +2

Blue:
Brightness: -5
Contrast +2

Green:
Brightness: -5
Contrast +2
Vertical Offset
Vertical Offset can affect both eyes, especially if the headset is tilted up or down. That’s why neither of my settings are 0. Before adjusting these settings, verify that your top strap is adjusted and the headset is in its “natural” resting position (where it normally falls into place).
Have you tried tweaking the vertical offset? I discovered that my eyes aren’t at the same height. I adjusted the vertical offset for my dominant eye (with the other eye closed) until I got the best image and then repeated the process for my other eye. On my original 8K, I discovered that +5.5 and +8.0 improved the 3D effect for me. On the 8KX I’m using -1.5 and +2.0; the difference is likely to be due to the Comfort Kit with its large facepad.
Caution! If you set your offsets to differing values (like I did) you may discover that things no longer line up in real life! This is especially true for me when I’m tired. I can concentrate and get things to line up again, but it’s a real side-effect. I now see 3D better in VR than in real life.
The proper setting probably varies from person to person. I think it depends on the shape of your face, which causes the headset to tilt slightly. Apparently, the MAS makes a difference too, since (for me) the optimal vertical offset setting differs greatly between my 8K and my 8KX.
SteamVR
I recommend leaving the per-eye resolution on Automatic, for simplicity. Otherwise, I find setting it to 100% and using PiTool Quality to adjust the super sampling seems to yield the best image quality. When you set SteamVR to 100%, I think it can skip a resizing step, which seems to improve the image quality. It’s possible that I’m wrong, since this is strictly a subjective test. Anyway, this limits the range of resolutions available, since PiTool only has large increments, so some people prefer to leave PiTool quality at 1.0 and adjust the super sampling in SteamVR (which has a continuous slider).
Note: It’s worth repeating: SteamVR is based on number of pixels, unlike PiTool Quality which is based on the x and y dimensions. That means that these two setting are not comparable. Changes to PiTool Quality increase the number of pixels rendered at a much higher rate (4x) compared to SteamVR.
maxRecommendedResolution
If you are using Parallel Projection and your image is blurry, your maxRecommendedResolution is probably too low. This is especially bad when using Parallel Projections, which is required for Elite Dangerous.
Pimax Experience is supposed to fix that automatically, so you don’t have to manually edit the VR configuration file. Otherwise, this SteamVR issue is limiting your res and you need to edit the maxRecommendedResolution setting in your steamvr.vrsettings file. Just search this forum for details, which are in numerous posts. Here’s a good place to start: https://community.openmr.ai/t/how-to-make-your-pimax-image-picture-screen-clear-crisp-increase-clarity/29688?u=neal_white_iii
Flashing the Headset Firmware
The PiTool installer will normally take care of “flashing” (updating) your headset firmware. Here are instructions in case you find yourself in the rare situation where you need to update the firmware: Flashing the Firmware
Games
Elite: Dangerous
This game is the reason I finally joined the VR scene.
ED has serious aliasing problems, due to the artwork design (lots of parallel rods for grates and such). It is just about the worst case possible. (Other games look great.) A much higher res helps reduce the aliasing a lot. Unfortunately, since Parallel Projections are required, you lose about 30% of your graphics card’s rendering speed. It’s reached the point where I’ve decided to play Elite Dangerous in Small FOV, so that I can get higher super sampling and a good framerate. The narrower view isn’t too bad; I just pretend that it’s the edges of my helmet.
ED does not have a benchmark. If you’d like to get a baseline framerate, the simplest thing to do is just use fpsVR to measure the framerate in the initial hanger area when the game first opens. That scene is actually representative of the framerate you get when you are in a station, which is one of the more demanding areas of the game.
My settings, which looked “ok” in ED on my 8K, looked quite bad on my 8KX. To look good, you really need a higher resolution. The small text in Elite Dangerous was very hard to read on my 8K. The 8KX text is now easily readable. The 8KX screens are a big improvement.
I have an overclocked RTX 2080 and I’ve set PiTool Quality to 1.0 with Conservative FFR, Small FOV, and SteamVR super-sampling to 100%. My in-game graphics quality is set to High, for most options. This looks fairly decent and my framerate is fairly good; however, but I’m really looking forward to getting a 20GB 3080. That should be a huge improvement.
Half-Life: Alyx
On my 8KX Half-Life: Alex looks great and plays great. This game is not particularly demanding and I’m nearly always getting 75 FPS, but the details do not suffer. This is clearly a AAA VR title. As an example of the details in this game, Alyx’s gloves look so good my brain accepts them as “real”. This game can be run with Parallel Projections turned off, but you need to configure the “Launch Options” in Steam to: (Discovered by @NextGenVR)
-console -vconsole +sc_no_cull 1 +vr_shadow_map_culling 0 +vr_multiview_instancing 0 +volume_fog_enable_stereo 0
Other Games and Apps
Some games (like Hellblade) may crash at start up. It seems that some games apply a large super sampling value to your per-eye resolution. I could only play Hellblade with PiTool Quality set to 0.5. The game actually looked pretty good on my 8KX (and didn’t appear to be using low res).
Movies
The 8KX excels for watching movies. It’s almost as good as having a projection TV. I use Simple VR Video Player (or if that doesn’t support a particular video codec, I use VLC Media Player (or YouTube) and Virtual Desktop).
I’d really like to see a 72 Hz option for my 8KX (at native res). It’s really good for watching movies, but the framerate is a bit jerky at 75Hz. That isn’t an exact multiple of 24 Hz, which is what most cinema movies are filmed at.
Virtual Desktop
I had hoped to use my 8KX for Virtual Desktop, but I found the experience to be subpar, at least when compared to my 4K monitor. The main issue was that the whole screen was never all in-focus, unless I shrank the screen size so small that the text wasn’t easily readable. Setting your desktop resolution to a smaller resolution might help. Increasing the super sampling does help, but my system (i7-8700K, 32GB, RTX 2080) can’t run with an acceptable framerate if I do that.
Recommended Accessories
Counterweights
I’m a lot happier with my 8KX now that I’ve purchased the Studioform counterweights, which I really like. (I used a DIY counterweight for my 8K.)
It may seem strange to add weight to the headset, but it balances the load, so it’s much more comfortable. I only notice the extra weight when I rapidly turn my head, so a counterweight is probably better suited for slower-paced games.
I am now able to play Elite Dangerous for 2-5+ hours with a counterweight, whereas before I had to stop after an hour or so because of neck strain and pressure on my face. These 300gr counterweights seems to balance the headset well, without adding too much excess weight.
I really like these Studioform counterweights! They work much better than the DIY counterweight I have on my 8K, which dangles below the strap and swings around. I rate the product, packaging, and service as 5 of 5 stars. Studioform does great work. Pimax could learn a lot from the way they do things.
https://community.openmr.ai/t/new-8k-x-mas-counter-weights-available-now/31592?u=neal_white_iii
Remotely Controlling Power
I’m using a remote-controlled wall adapter with a USB charger cube plugged into it. This solution works well for me, but I do have to put the headset in standby, since turning off the power doesn’t turn off my 8KX (unlike the 8K behavior). I also use these power switches for my base stations. It’s all controlled by a single remote. There are also versions which can be controlled by your phone instead.
Here’s what I’m using:
https://www.amazon.com/gp/product/B00DQELHBS
https://www.amazon.com/gp/product/B083DD37W7
If I don’t put my 8KX in standby, it gets quite warm after a few hours. Also, my screens don’t turn off, which I think is due to a setting I changed. That will certainly reduce the lifespan of the device. In standby, the unit stays cool to the touch. Standby mode is indicated by a bright red LED and panels are completely black. Note that rebooting your PC will disable standby (and turn the LCD panels on).
[updated] Expanded the discussion about PiTool Quality, SteamVR per-eye super sampling, and improved the formatting. Added info on cleaning lenses and briefly mentioned Pimax Experience, as well as discussing top strap adjustment. More changes: updated the sections on IPD, backlight brightness, contrast and brightness.
 ).
).